
A client is the top-level workspace for a customer, brand, store, branch, or profile you report on.
To add one:
Open Clients.
Click Add Client.
Enter the client name.
Add optional details such as website, timezone, currency, manager, folder, and theme.
Save the client.
Only the client name is usually required. You can add the rest later from the client settings.
From Clients to Add Client
Start on the Clients screen, then open the Add Client drawer.

What the numbers show
Use the sidebar to confirm you are in the main Clients area.
Click Add Client in the top-right corner.
Existing client cards show the client name, website, data-source count, and creation date.
Complete the Add Client drawer
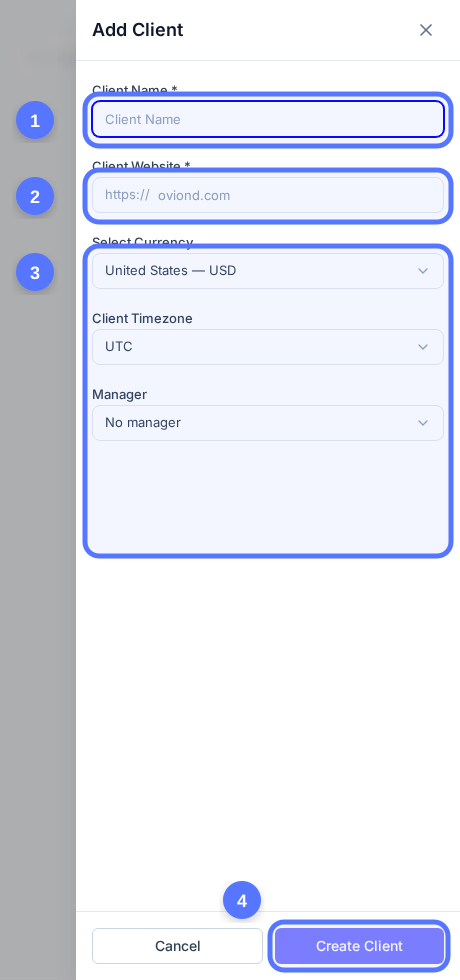
What the numbers show
Enter the client name as it should appear inside Oviond.
Add the client website. The https prefix is already handled by the field.
Review optional setup details such as currency, timezone, and manager.
Click Create Client when the required details are correct.