In this guide, we will show you how to connect Shopify as a data source to Oviond. This process involves setting up a custom app in Shopify and connecting it to Oviond.
Ensure you have an Oviond account with administrative access.
Access to your Shopify store's admin credentials.
1. Log in to Your Shopify Account
2. Navigate to Shopify's login page and enter your credentials
3. In Shopify, click on 'Settings' located at the bottom left-hand side of the dashboard
4. Create a Custom App
In Settings, click on 'Apps and sales channels' in the left-hand menu.
Click on 'Develop apps' and then select 'Create a new app.'
Give your app a name, such as "Oviond Connector."

5. Configure Admin API Scopes
Click on 'Configure Admin API scopes' and select the following READ ONLY scopes:
Read products (read_products)
Read reports (read_reports)
Read customers (read_customers)
Read fulfillments (read_fulfillments)
Read inventory (read_inventory)
Read orders (read_orders)
Read analytics (read_analytics)
Read marketing events (read_marketing_events)

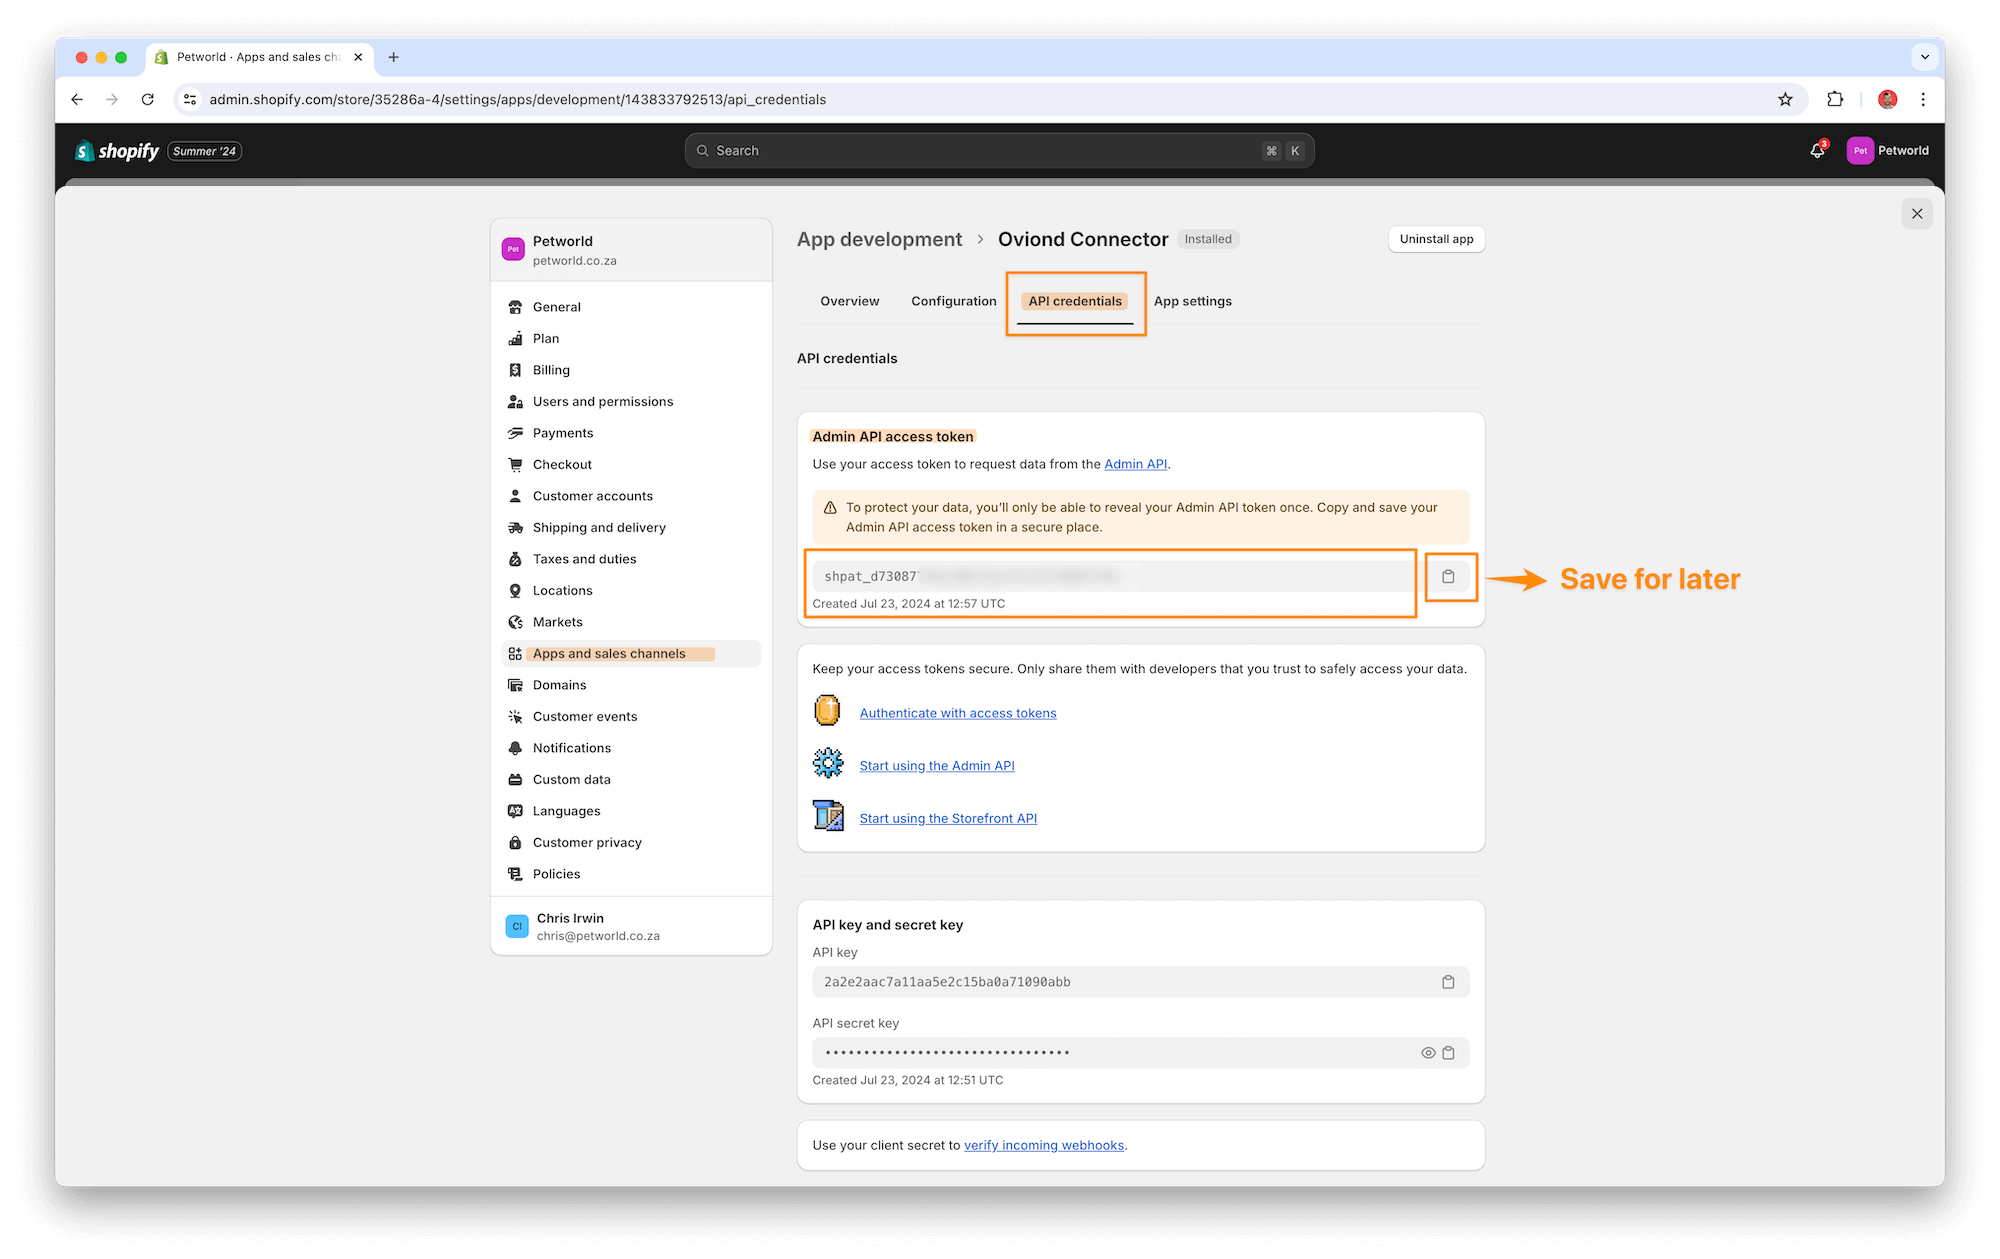
6. Generate API Credentials
Go to 'API credentials' within the app settings.
Click on 'Install app' to install the app.
After the app is installed, reveal the API token under 'Admin API access.'
Copy the API token and save it in a secure place (it will only be revealed once).
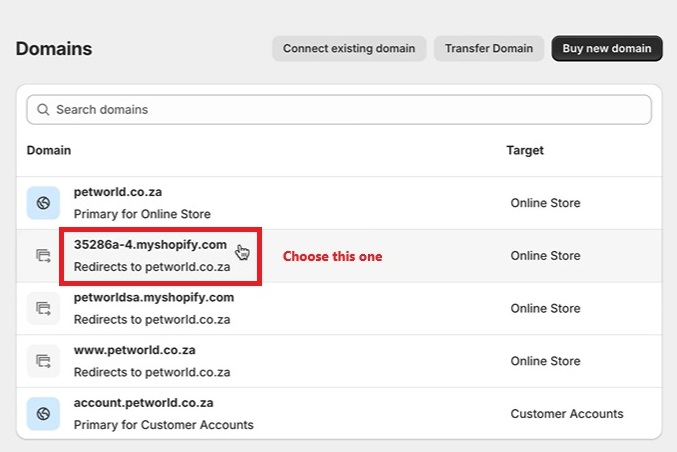
7. Retrieve Your Shopify Domain
Go to 'Domains' under Shopify settings.
Find and copy your primary Shopify domain, which ends with .myshopify.com.
1. Log in to Oviond and navigate to your Project Workspace Editor.
2. Click on Data Sources on the right-hand side.
3. Find and select the Shopify data connector.
3. Add a profile and give it a friendly name, such as "Shopify Main Connector."
4. Enter your Shopify domain (ending with .myshopify.com) and the API token you copied earlier.
5. Save the settings.
Tip: Ensure all required API scopes are selected in Shopify to avoid connection issues.
More on Shopify Custom Apps: Read the Shopify Custom Apps help center guide.
If you get a connection error message on your query:
Please follow these steps:
Click on the refresh button in the widget or next to the date selector in the project.
if the widgets still don't load data
Go to Data Sources or click on 'Edit connection' in the widget and make sure you have connected the correct Shopify account. You will need to add a new authenticated account and make sure you have used the correct API and domain.
If you have followed these steps and are still experiencing issues with Shopify on Oviond, please contact support.
By following these steps, you can successfully connect Shopify to Oviond, allowing you to streamline your data integration process and leverage your Shopify data for dashboards and reporting.
How to connect a data source from a widget
Learn how to connect a data source from a widget in Oviond with this step-by-step guide for seamless data integration.
